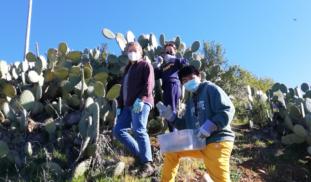
Harvesting Prickly Pear Cactus Stems
The prickly pear cactus can propagate, which means the stem can be removed and planted to become a new individual cactus. We use this method so that we can experiment on cactus stems without having to grow each cactus from a seed, which is a much slower process. Our methodology begins with harvesting prickly pear cactus stems.
Step 1: Identify the stem
The stem on most plants is pretty easy to identify. They're usually thin, green, flexible and attached to the leaves. The prickly pear cactus, however, doesn't really look like most plants. So, which part is the stem? One might guess the spines are the stems, but these are actually modified leaves! The stem is the oblong-shaped flattened paddles. These are modified flattened stems called cladodes. You can learn more about cactus morphologies in Gibson and Nobel's 1986 The Cactus Primer.

Step 2: Find an established plant that wouldn't mind losing a few stems
Because we're researchers on a budget, we chose not to purchase stems from a plant nursery and instead decided to find some well established prickly pears with many stems. Luckily, the University of California, Santa Cruz has a few plants scattered about the campus. We located a large plant, about 4 meters tall with many stems.

Step 3a: Harvest the stems
Once we located the plant, we drew our bread knife, donned our gardening gloves and began the prickly process of removing stems from the plant. We begin cutting just above where the stem grows out of the previous stem. We use a bread knife because we found it was the quickest and easiest to cut the thick stems. We have tried a smaller knife, a box cutter, and gardening shears; each left us feeling as if we had just completed a serious arm workout! The stems are about 2.5cm thick and the bread knife saws through the plant with much less effort. We also found that working in pairs makes the process much smoother: one person uses wire cutters to remove some spines so they can get a good, pain-free grip on the stem while the other removes the stem from the plant. You can watch this process below:
Step 3b: Remove any spines that got lodged in your fingers and hands
We found that tweezers work best.
Step 4: Let the stems form a callous
Once harvested, the cut part of the stem needs to heal and form a callous before it can be planted. This is so the cactus doesn't absorb too much water, which can harm the plant. This process can take 1-2 weeks.

Step 5: Plant the stems
Once the callous has formed, the stems can be planted. We use pots that are slightly bigger than the widest part of the stem and plant them about 5cm deep in well draining soil. We use rocks and bamboo to hold the stems in place until they form roots and can hold themselves upright. It's important not to water the stems until the roots have formed because the stem can rot if it sits in wet soil.


Step 6: Experiment!
Once the stems have formed roots, they're ready to be used in experiments! Check back soon to learn about our current experiments.
Have you ever propagated a cactus? Tell us about it in the comments!
0 comments